Showing posts with label home decorating. Show all posts

Wednesday, April 17, 2013

Home Tour

Got my loft ready for a condo board meeting and took some pictures after. You can tell we need more lighting and we have a few other changes planned for the near future.


Entry


Kitchen


Entering second bedroom area

(eventually will put a door here)


Second Bedroom


 Living Space

We keep flip flopping where the dining table goes, sometimes it's in this corner, but not this time


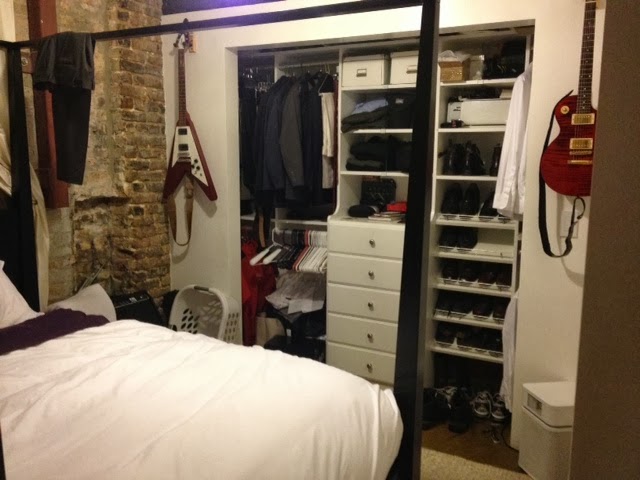
Master Bedroom


Bathroom


Monday, September 3, 2012

Geometric Painting for Bathroom

The bathroom in my loft is stark white. It was done up really spa like when we were house hunting. We moved in and put up a white shower curtain and our set of towels in two colors that don't match the bath mat we had (didn't get the upgrade for the mat when we got married). At best the room felt spartan, at the worst if felt like a bachelor pad. Oh, and the cat box had to go in here too.

I wanted to paint the whole room a warming taupe. My husband disagreed. With family coming to stay for the first time at the end of summer, I knew I had to do something. One of the biggest problems was tying the colors in the room together to each other and also the rest of our loft. After being inspired by another blogger's geometric painting, I decided to do a painting similar to a type of project I would do with my art students. Instead, this time I would keep my lines white by employing painters tape. 

If you saw my painting post, you know I have 13 paint samples leftover from our "great indecision".  I decided to put some of them to good use for m painting. I only had to buy a canvas from my local art supply store, the rest of my supplies included the paint samples and leftover painters tape and or course my own brushes.

I chose four colors: the gray from the TV area and a small accent wall, the deep teal in the entryway, the taupe I wanted for the bathroom, and a muted purple (we love purple).

Tips: Use different thicknesses of tape for interest. Trust your instincts and your eye for your own composition.

The whole process took me just a couple hours.

at the beginning, used a chair for an easel 

just starting to paint

done!

After hanging it in the bathroom, I upgraded the shower curtain to match the taupe in the painting and now even have a matching bathmat. 

before...all white

 Now where the painting is installed, across from the mirror

Wednesday, June 13, 2012

DIY: Custom Copper Curtain Rods

Living in an industrial space brings ups challenges when decorating your home. We decided for not just aesthetic reasons, but also for better energy efficiency that we needed drapes. We picked out beautiful champagne/mushroom (nice neutral) colored curtains with a great raw texture to them. The color really complements the brick it's against and blends nicely. We didn't want a color that screamed, "Hello you have lots of fabric over here!" These curtains also have blackout lining that helps to significantly block the heat from the afternoon sun.

We decided to mike some out of plumber's pipe to get that industrial feel. Because we were making them ourselves, we spent the extra money to upgrade to copper pipe. My husband just LOVES copper; I think it's because it matches his hair. On our trip to HD, we got funny looks from the people in the plumbing section. I guess where we live, people don't do DIY projects like this with unconventional materials. Finally the guy figured out what we needed a showed us to the adapter that connects copper pipe to a floor flange. We found out copper pipe that says 1/2" is different than 1/2" steel pipe and you need an adapter to bridge the gap since floor flanges are sized to the steel pipe. Because of the amount of stuff we were getting, I caved and signed up for the HD card. With our savings, we only spent around $120 on all the pipe and fittings for two 8' and one 4' wide windows. That doesn't include the pipe cutter at $11 and the hammer drill my husband ended up buying to drill into the impossibly hard concrete. I did the measuring and marking, he did the drilling. I cut the pipe (once I got the pipe cutter, before it was him with the Dremel) and polished everything with Barkeepers Friend.

Supplies:
3 - 10 foot copper pipes, 3/4 inch, Blue type (meaning sturdier)
8 - Floor Flanges for 1/2" pipe
8 - 3/4" to 1/2" copper adapter with threading (not sure of technical term)
6 - Elbow joints
2 - T joints
Screws (get appropriate mountings for your walls, in our case masonry screws)
Pipe cutter
Barkeepers Friend
Drill and bits
Measuring tape


My Dremel is in the shot because initially we used it to cut the pipe. It's fine if you only have one window and only a few cuts to make. Way too time consuming for more. So after first small window was completed, I went and bought a pipe cutter. Worth it! The adapters I was talking about are in the foreground between the screws and drill bits.


Installing the flange, the adapter, short pipe, and elbow. Great thing about copper is you don't have to thread the pipe. It just slides right into the fittings. We didn't even solder or anything so we can still take the curtain down, but everything holds together without it.


Cutting with Dremel and polishing. Wear gloves and read directions.


Final pictures. They are a little dark because it was night when we finished and we still need to get more lighting for our place. In the pictures, the curtains almost look pinkish, but trust me, in real life they are not at all.

So in the end, I have converted my husband into a man who wants to figure out how to make something instead of buying it. Finally! Now he wants to tackle all kinds of other things and loves the feeling of a power tool in his hand!


Little story about getting all this home without a car:

We walked to our local HD. We're lucky we have one just over a mile away. We picked out all our supplies and then I waited outside the entrance with our big cart while my husband went to the corner to try to flag down an appropriately sized taxi. After about 10 min with no luck, I called my favorite cab company. They said it would be a hour! So I called another. They said I would get a call when one was on the way. Fifteen more minutes went by with no call. Finally a Scion cab came and was dropping off a passenger. After a little convincing on my husbands part, the driver and he tried to fit the 10' pipes in diagonally from the corner of the windshield on the passenger side to the back corner of the trunk. The trunk closed with not a millimeter to spare! Once we were all inside and on our way, the cab company called with  an automated message that our cab was there. Gee Thanks! 


Wednesday, May 30, 2012

Finding Home Design Inspiration in a Hotel

My husband works for a hotel in downtown Chicago. He had to stay there for the weekend of the NATO conference in Chicago and I got to join him for the weekend! I love staying in hotels, especially fancy ones. I knew the hotel had undergone some renovations in the lobby and restaurant. I met him downstairs and he gave me the key to the room. When the elevator doors opened to my floor, I was stunned. I was expecting the traditional old world hotel look it always had. I had no idea the entire floor had been remodeled.

Everything was done to my taste: beautiful greys, accents of purple, a mix of textures, and shinny things. It continued into the room. I didn't post any of the room itself because while pretty, it was very small. The bathroom is inspiring me to start work on my own. Everything is white in my bathroom: walls, tile, cabinet, counter, sink, and curtain. I want to do something to warm it up. 


 View I had from elevator. We already have the cream colored, leather couch.

 Don't you just love the chandeliers!

 This picture doesn't do it justice.

Love the dark wood contrasting with the white stone counter.


I love the textured wallpaper they used with just a bit of shimmer. I'm thinking of doing some kind of painting technique. I'd also love to darken the cabinet, but who knows. My husband isn't too keen on doing much for the bathroom right now. I might have to settle on my idea of making a painting and finally getting a bathmat to match our towels.

Where do you find design inspiration? 


**Over this past weekend, my husband worked on a big project. I'll be posting about it soon.

Wednesday, May 2, 2012

Framing a Print

I have a ton of artwork I created in college. I had always wanted to get some of the best work up on the wall in my home, but it took buying a place before that happened.

My favorite piece is a copper plate etching of Big Ben. It is not a normal size, so it would require a custom frame and mat. Even with the online options for custom frames, this was too expensive of an option when I was trying to get so many other projects done in time for my friend's visit. Luckily, I'm resourceful. I thought of just buying the best size possible and having just the mat cut. Michael's had frames on sale, but the mat would be way too much money and take 2 weeks. What was that about? So then I thought of how I loved the torn edges of the paper and how I should display the whole piece, so it wasn't just a picture, but an object. Shadow boxes that big were once again way out of the picture.

Then I thought floating frame, you know glass front and back so you see the wall through it. I found a tutorial and thought I could pull it off. Getting a backing glass cut was out (money), so I ended up buying a cheap poster frame in the same size as the frame I was buying on sale. The tutorial I had seen online was for a much smaller frame that didn't involve real artwork. I didn't want to completely glue and seal in my print, so I thought of using tiny nails like the brackets that hold the back of a frame in. I took precautions and went slowly with my nailing. I got almost done, we are talking the last nail, and it was too much. The front glass got a hairline crack that spread. I can't begin to describe the utter frustration I felt. I had spent hours planning, researching, going back and forth to different art stores to get frames and the right acid free adhesive for the print. All without a car. Do you know what it's like hauling a 2' x 3' frame on a city bus.
"Fail"

So I was left with a frame, a plexiglass front from a poster frame (what was going to be my back) and a print needing a home. Back to the local art store (no more Michael's for me), I got a coordinating color of mat board and they cut it to size for the frame (only 50 cents a cut thank you local art store). Back to carefully lining up my print on the mat, always leave more room at the bottom, and taping down with a stronger hold then my first go around. Now it hangs right by the front door, hiding the fuse box. It's the first thing you see when you open the door.

"Success"


I posted a link to a link up party on GetOuttaMyHeadPlease for my Family Name Eye Chart and accidentally posted this link.

Thursday, April 26, 2012

New Twist on the Family Name

Here's another project I completed in time for my friend's visit. I was inspired by David Bromstad from "Color Splash". He always does a painting for any room he makes over. In this one, he created a painting with the names of all the family members in the style of a eye chart. I thought it was a great twist on how to have a personal, family name painting. It's a bit more subtle, and therefor, I daresay, a little more sophisticated (which is what my loft likes).

I first created the image in photoshop, and agonized over the font choice (as I tend to do). Then, using my projector again (I did this the same weekend as the mural) I traced the text onto a stretched canvas in pencil. I will note, this project is not for the faint of heart, it takes a crazy steady hand and super patience. My skills from typography class finally paid off (we did every project my hand). After I finally finished tracing, I used a variety of brush sizes and shapes to fill in the letters in a very dark grey. My advise, go slow and take breaks. I ended up leaving the background completely white. I may eventually add the hint of a gradient in the corners, as if it were illuminated from behind, but I'm not sure.

Here's the final result.


It sits on the brick in the black nook that used to be an original window because the 3M picture hanging strips won't stick to the concrete we have no intention of trying to drill into. It's next to our vintage 1920's dinning room set.


Ninth Street Notions

Thursday, April 19, 2012

Understated, Modern Family Room Mural

I'm an artist, when I have the time. So even before we moved into our new loft last year, I knew I wanted to paint a mural. In the TV area was a big beautiful (at the time white) wall. It spoke to me. It wanted something inspired by the city, not an ordinary framed picture, but an abstract painting right on it. I decided to do a contour outline of downtown Chicago. The adjacent wall was back at the time, so I first thought continue the black as the line to help tie the two together. Then we decided to paint both walls grey (see the post here). The mural kept getting put off.

About a month out from my best friend's visit for the first time since we moved in, I decided it was time to get lots of projects finished, including the mural. (Nothing like company coming to get you to finally check off your to do list. ;) ) I searched all over the internet for a great reference picture and finally went with a photo my husband took while on a sailboat in Lake Michigan. 

I brought my projector from school home for a long weekend. I set it up on one of our height-adjustable stools and plugged it into the computer. I had to play with the sizing on the screen till I got it just right, and then it was just a matter of tracing on the wall in pencil. Pretty easy, just don't rush. I was going to go with a  white paint for the line, but my husband convinced me to use the gold paint that was left over from our paint sample buying extravaganza. I tested it out just behind the tall shelf on the side. IT WAS HOT! I ended up having to do two very careful coats of the gold to get an even consistency, but it was worth it. We love the result so much that we are going to continue the mural to the wall behind the TV (eventually).


Thursday, April 12, 2012

Eco-Friendly Picture Frame Updates

This past winter I was back in Dallas for my  visit to my Mom's house. She always has projects for me to do around the house. While growing up, I was the one who acted like the handy man in the family (and also the geek squad and interior decorator). I love helping my mom any way that I can.

Anyways, back to this past winter, she was working on creating a family wall (you know the large grouping of family portraits). We went through the large collection of photos, old and new, and started taking pictures out of frames and picking and choosing the keepers. My mom had a large collection of frames in all sizes and finishes, metal, wood, and black. We wanted to create a more cohesive look, so we decided on silver and black. So many of the old frames were natural oak and dated looking, but we hated just wasting them. It finally dawned on me, why buy new ones, just paint the old ones, "duh". 

The summer before, I had spent the better part of my month home spray painting branches and other things for my wedding; so I was a pro. 

We went to HD and bought a can of good quality, glossy finish, black spray paint. 

I removed the glass from the frames.

Sanded the wood.


Placed them on plastic garbage bags in the driveway.

Painted backs first and let dry.

Turned over and painted fronts. (you may need to sand paint drips like in photo) Did a second coat on front as needed.

Wash glass and put back in. Frame pictures.

Easy. Cheap. Less than $5 got us 6 new-looking frames.

I highly suggest the investment (like $2) in a nozzle gun thingy. Saves your fingers alot of pain.

It was dark when I finally got the fronts done so no pictures, sorry. I'm sure you get the idea.

Related Posts Plugin for WordPress, Blogger...